总结一下WebGL中,2d纹理映射。本文只包含单纹理映射。
加载shader文件,初始化WebGL上下文,加载需要映射到WebGL的图片:
private gl:WebGLRenderingContext;
private shaderLoader:ShaderLoader;

public constructor()
{
    this.shaderLoader = new ShaderLoader();
    this.shaderLoader.load('shaders/simple_texture/vertex.glsl',
            'shaders/simple_texture/fragment.glsl');
    this.shaderLoader.addEventListener('ShaderComplete', this.onShaderComplete, this);
}

private onShaderComplete(event:Event):void
{
    this.gl = RenderContext.createConext();
    let shader:ShaderResult = event.data;
    initShaders(this.gl, shader.vert, shader.frag);
    this.loadImage();
}

private loadImage():void
{
    let image:HTMLImageElement = new Image(); // Create an image object
    image.onload = ()=>{
        this.initTexture(image);
        this.initVertexBuffers();
        this.draw();
    };
    image.src = 'resource/sky.JPG';
}
对应的shaders,分别是顶点shader和片元shader:
attribute vec4 a_Position;
attribute vec2 a_TexCood;
varying vec2 v_TexCood;

void main() {
    gl_Position = a_Position;
    v_TexCood = a_TexCood;
}
precision mediump float;

uniform sampler2D u_sampler2d;
varying vec2 v_TexCood;

void main() {
    gl_FragColor = texture2D(u_sampler2d, v_TexCood);
}
初始化顶点信息:
private initVertexBuffers():void
{
    let vertTexs:Float32Array = new Float32Array([
        -0.5, 0.5,  0.0, 1.0,
        -0.5, -0.5, 0.0, 0.0,
        0.5, 0.5,  1.0, 1.0,
        0.5, -0.5, 1.0, 0.0
    ]);
    let gl:WebGLRenderingContext = this.gl;
    let vertTexBuffer:WebGLBuffer = gl.createBuffer();
    gl.bindBuffer(gl.ARRAY_BUFFER, vertTexBuffer);
    gl.bufferData(gl.ARRAY_BUFFER, vertTexs, gl.STATIC_DRAW);

    let FLOAT32_SIZE:number = vertTexs.BYTES_PER_ELEMENT;

    let a_Position:number = gl.getAttribLocation(gl['program'], 'a_Position');
    gl.vertexAttribPointer(a_Position, 2, gl.FLOAT, false, FLOAT32_SIZE * 4, 0);
    gl.enableVertexAttribArray(a_Position);

    let a_TexCood:number = gl.getAttribLocation(gl['program'], 'a_TexCood');
    gl.vertexAttribPointer(a_TexCood, 2, gl.FLOAT, false, FLOAT32_SIZE * 4, FLOAT32_SIZE * 2);
    gl.enableVertexAttribArray(a_TexCood);
}
顶点数据的数组每一行中(如-0.5, 0.5, 0.0, 1.0),包含了顶点坐标和纹理坐标(各占两个元素),纹理坐标的范围是0-1.
通过a_Position和a_TexCood参数分别把这两种坐标数据传入顶点shader中。顶点shader在经历图元装配和光栅化过程之后,获得的片元坐标插值保存于v_TexCood中,然后传入片元shader,通过texture2D(u_sampler2d, v_TexCood)的采样操作,获取片元的颜色值,赋值给g_FragColor的内建变量。
初始化纹理信息:
private initTexture(image:HTMLImageElement):void
{
    let gl:WebGLRenderingContext = this.gl;
    let texture:WebGLTexture = gl.createTexture(); // Create a texture object
    // Get the storage location of the u_Sampler
    let u_Sampler:WebGLUniformLocation = gl.getUniformLocation(gl['program'], 'u_sampler2d');
    gl.pixelStorei(gl.UNPACK_FLIP_Y_WEBGL, 1); // Flip the image's y axis
    // Enable the texture unit 0
    gl.activeTexture(gl.TEXTURE0);
    // Bind the texture object to the target
    gl.bindTexture(gl.TEXTURE_2D, texture);

    // Set the texture parameters
    gl.texParameteri(gl.TEXTURE_2D, gl.TEXTURE_MIN_FILTER, gl.LINEAR);
    // Set the texture image
    gl.texImage2D(gl.TEXTURE_2D, 0, gl.RGB, gl.RGB, gl.UNSIGNED_BYTE, image);

    // Set the texture unit 0 to the sampler
    gl.uniform1i(u_Sampler, 0);
}
这个方法集中了对纹理相关的操作。
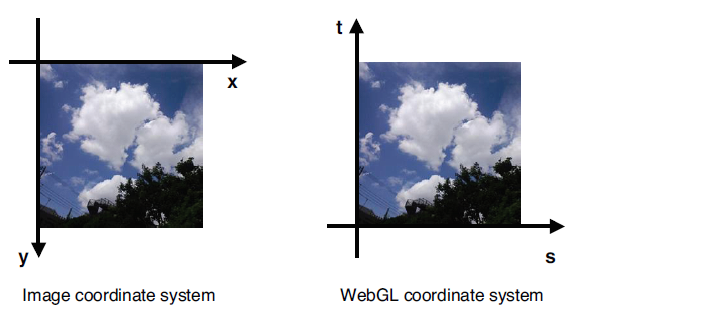
gl.pixelStorei(gl.UNPACK_FLIP_Y_WEBGL, 1); // Flip the image’s y axis
这个方法是对DOM的图片元素进行了翻转,因为二者的坐标的Y方向相反,如果不翻转,映射的结果是和原始图片的方向相反。

gl.activeTexture(gl.TEXTURE0);
这个方法用于激活纹理单元。WebGL系统支持多重纹理绘制,即在同一个UV纹理坐标上,可以同时叠加颜色。WebGL至少支持8重纹理叠加:gl.TEXTURE0,…glTEXTURE7.不同的浏览器实现有所差别。
gl.bindTexture(gl.TEXTURE_2D, texture);
这个方法用于绑定纹理目标,和顶点数组类似,纹理目标也对应纹理的类型,纹理类型在WebGL中包含:gl.TEXTURE_2D (2维纹理)和gl.TEXTURE_CUBE_MAP(立方体纹理).
gl.texParameteri(gl.TEXTURE_2D, gl.TEXTURE_MIN_FILTER, gl.LINEAR);
这个方法用于设置纹理参数。
gl.texImage2D(gl.TEXTURE_2D, 0, gl.RGB, gl.RGB, gl.UNSIGNED_BYTE, image);
给纹理目标赋予数据对象(图片数据)。
WebGL绘制:
private draw():void
{
    this.gl.clearColor(0.0, 0.0, 0.0, 1.0);
    this.gl.clear(this.gl.COLOR_BUFFER_BIT);
    this.gl.drawArrays(this.gl.TRIANGLE_STRIP, 0, 4);
}
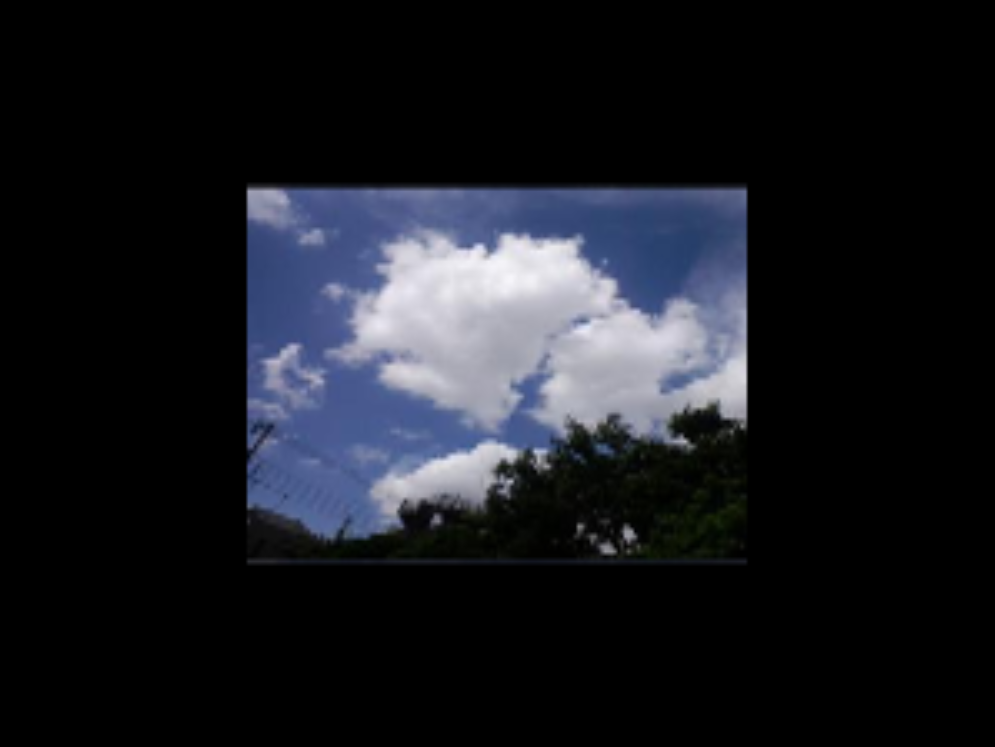
最后的效果图:
